

Guide
System configuration and advanced settings
HR software rarely fails for lack of features; it fails because settings are scattered and nobody knows which ones are on. Rifena gathers every setting into one ordered map, turns on only what the company actually uses, and lets you verify the result with a representative account before handing over.
The work is complete when administrators have configured only the areas the organisation uses, verified them with a representative account, and handed off every active, not-applicable, or specialist-owned item.
Current Settings map
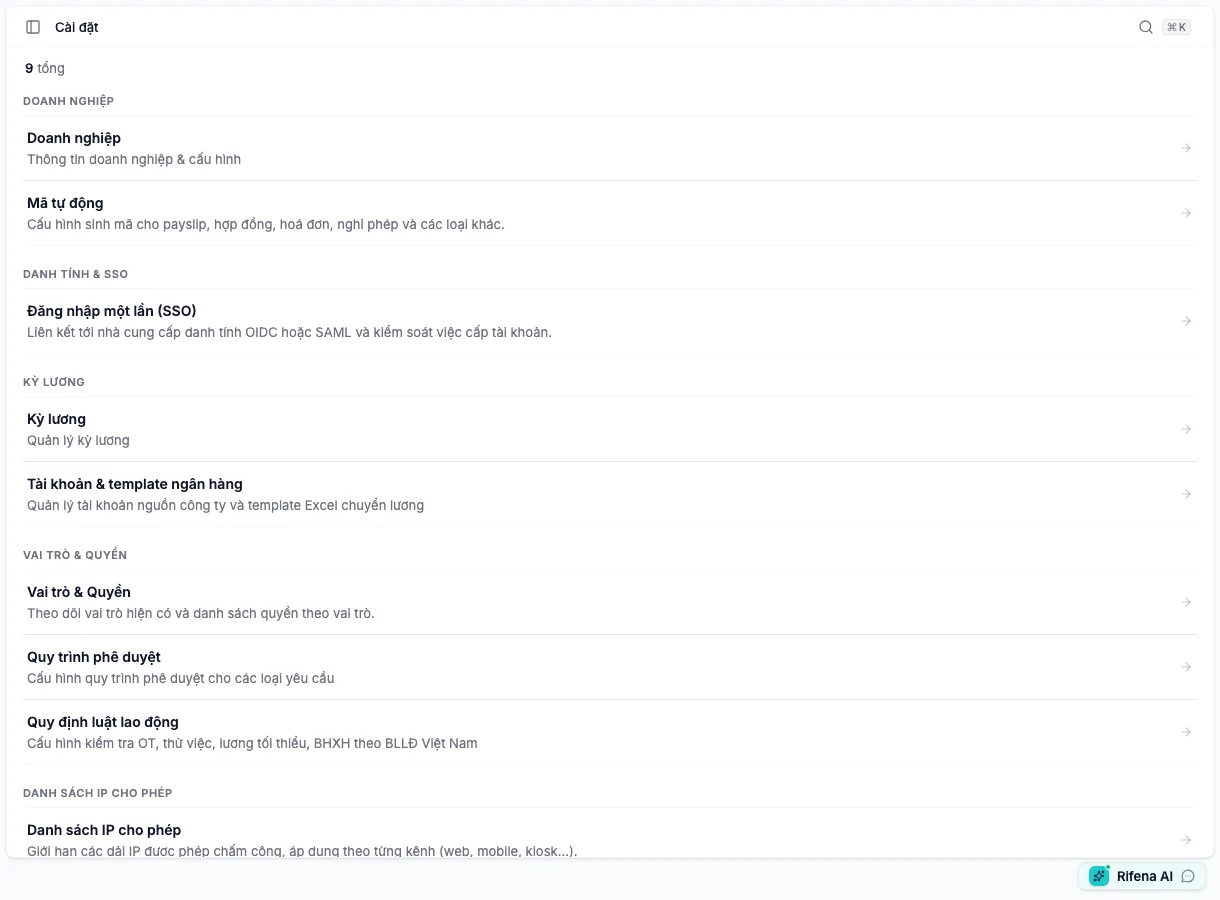
Open settings. The page lists only the areas available to the account; a missing card does not by itself mean the feature was removed.
| Visible area | Purpose |
|---|---|
| Open organisation settings | Name, logo, timezone, language, and payroll region |
| Open roles and permissions | Roles, effective permissions, and data scope |
| Open approval workflows | Approval steps and decision owners |
| Open payroll-period settings | Period generation, attendance close/reopen, and payroll coordination |
| Open labour rules | Apply statutory rules in Warn or Block mode |
| Open automatic codes | Patterns and counters for new records |
| Open IP allowlist | Network ranges used by attendance checks |
| Open single sign-on | Identity configuration; it does not prove a connector is active |
| Open bank configuration | Source accounts, spreadsheet mapping, and transfer preview |
| Open statutory report templates | Appears only when Rifena has enabled the feature for the organisation and the account can generate statutory reports; manages filing workbooks and mapping history |
Recommended configuration order
1. Confirm Organization
Review the display name, timezone, language, and payroll region before creating date-effective data. A wrong timezone makes effective dates, attendance, and reporting difficult to reconcile.
Expected result: the organisation details remain correct after reload, and later work uses the same context.
2. Bound access before expanding configuration
In Roles & Permissions:
- select the role to review;
- keep only the view, create, edit, delete, or approval actions the job needs;
- confirm company, group, or selected-person scope;
- save, refresh the representative account’s session, and open the target page;
- confirm out-of-scope areas remain hidden or denied.
Do not use one full-access organisation administrator to prove a manager or employee journey.
3. Complete Approval workflows
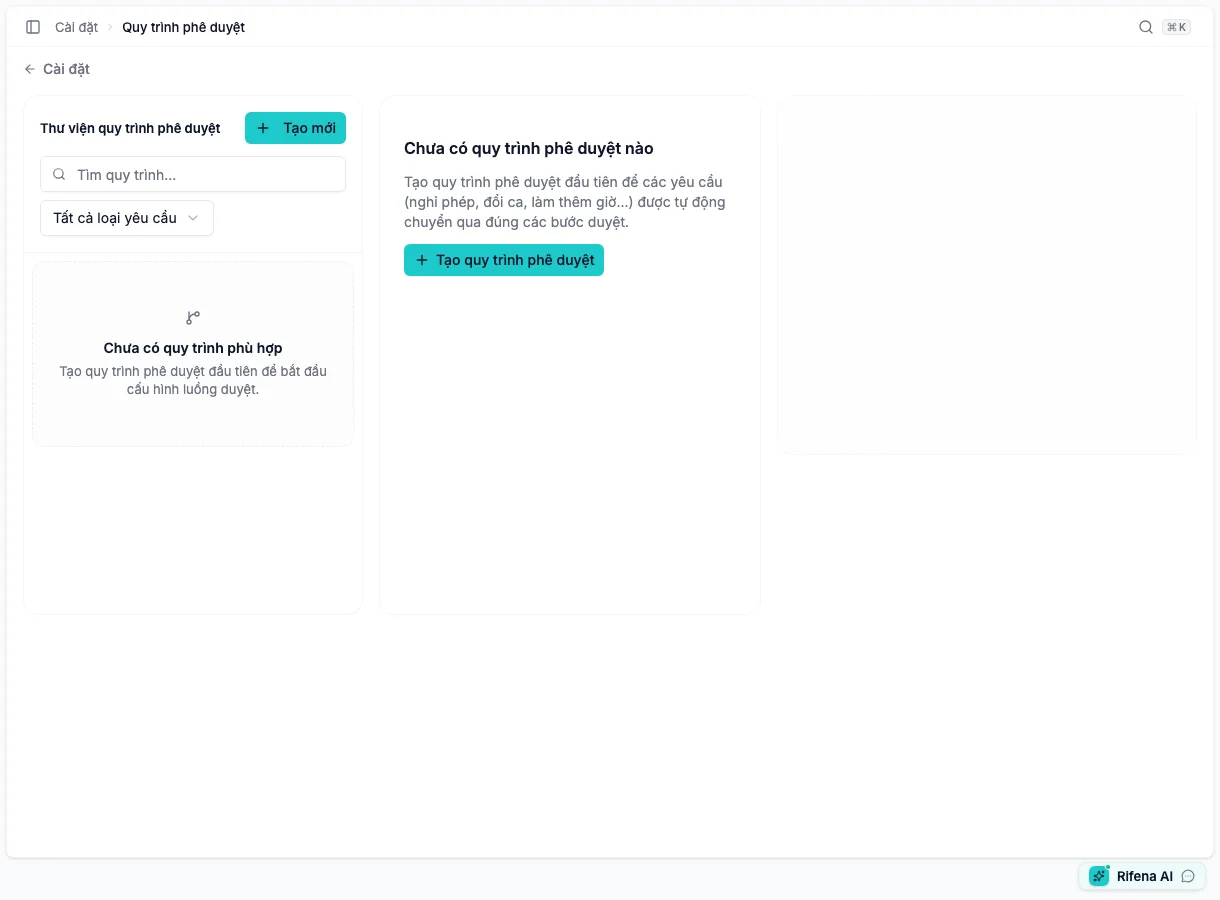
Create or open the definition for leave, overtime, or the business request in scope. Each step needs an approver source, conditions, and overdue handling. Resolve every readiness error before activation, then submit one safe test request and confirm the intended decision owner receives it.
4. Prepare Payroll periods
Review the cycle type, dates, and automatic generation. Attendance starts in Attendance open and must reach Attendance closed before a payroll run can use the period. Reopen only after assessing affected payroll runs.
5. Apply Labor law rules
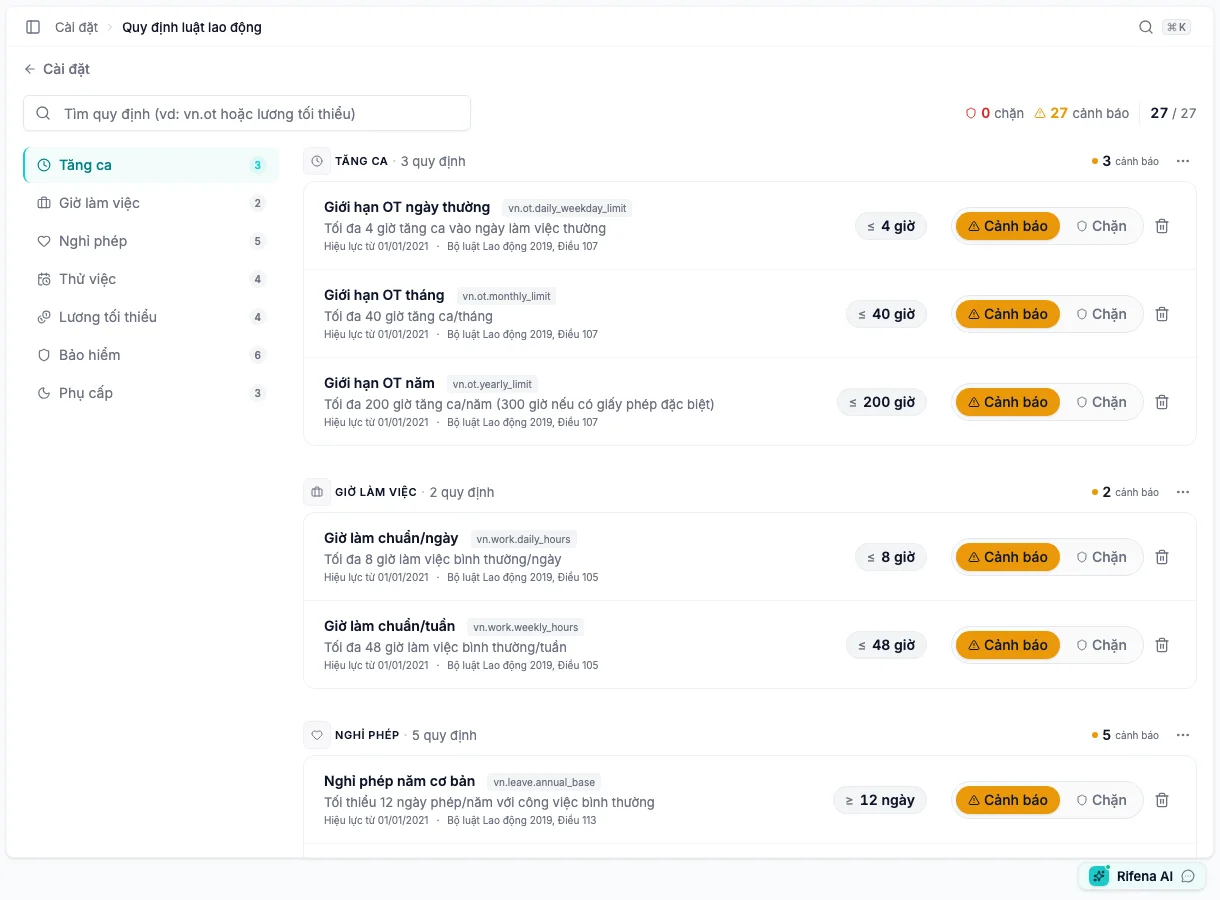
Current overtime limits live here, not on an OT policies screen. Review the source, effective date, and scope before moving a rule from Warn to Block. Test one representative record before broad application.
6. Standardise Auto codes
Review each record type, pattern, and next-code preview before saving. A counter reset requires a reason and a next value that cannot duplicate an issued record. Do not delete history to force the counter backwards.
7. Bound networks for attendance events
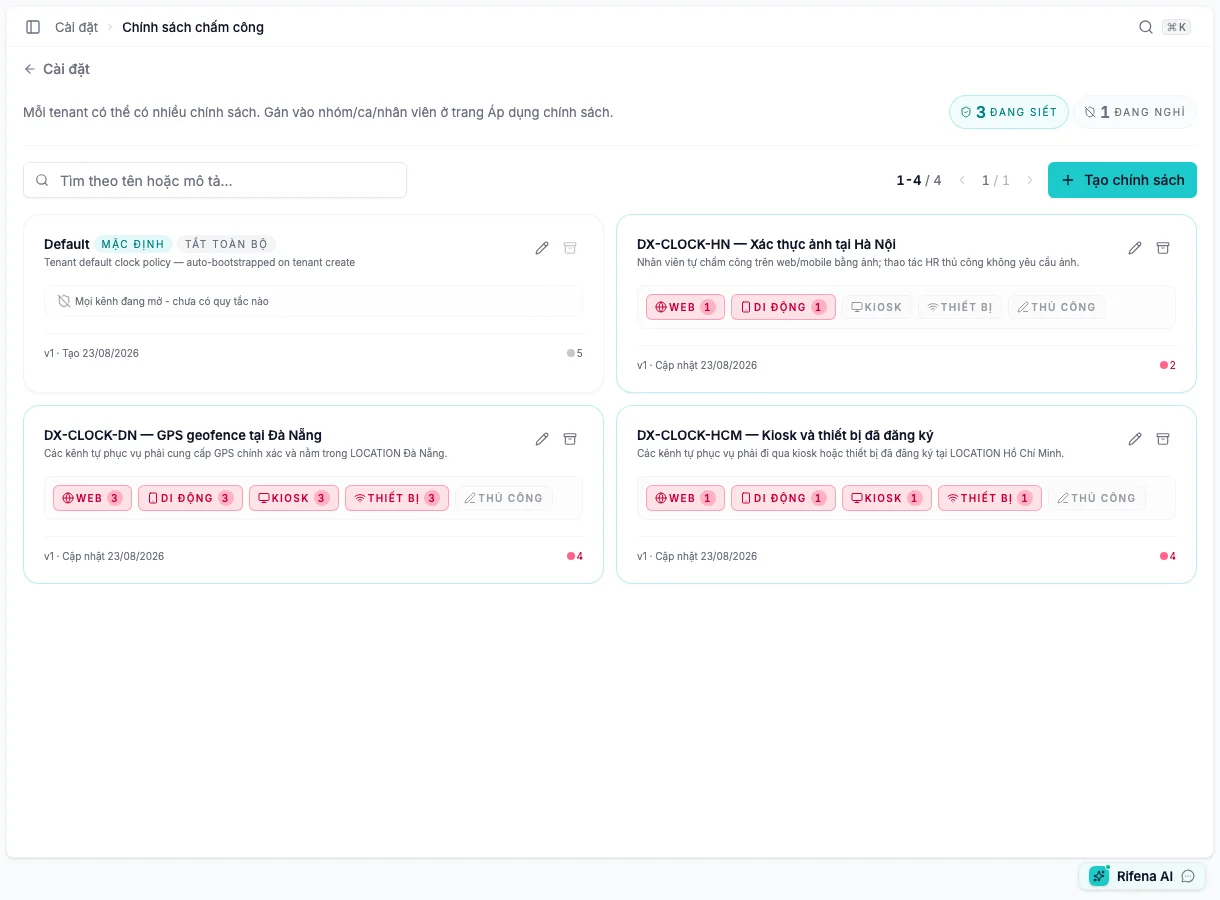
In Allowed IP ranges, enter a network-verified CIDR and select Web, Mobile, Kiosk, Device, or Manual sources. Selecting no source means all sources. This list participates in an attendance check only when the effective policy requires IP; it does not protect sign-in or the whole administration area.
8. Keep Single sign-on (SSO) fail-safe
Open single sign-on (SSO) separates an external provider used to enter Rifena from internal applications that accept Rifena accounts. The current screen can store configuration but explicitly states that the external sign-in connector is not active. Configured is not Active.
9. Verify Bank accounts & templates
Choose the source account, upload an .xlsx file, use its first worksheet, and
map at least unaccented recipient name, destination account, amount, and payment
reference. Save only after Preview shows the expected columns and order with
sensitive sample data masked.
10. Set up a statutory report template
Use this section when your organisation needs a new Excel template or the provider changes its format. If a template is already ready, go straight to Statutory reporting.
A template is the Excel layout you want to fill. Mapping connects its columns or cells to the corresponding Rifena data.
Who does this: the person responsible for templates, with access to generate
statutory reports. Prepare the required .xlsx file, up to 25 MB, and confirm
its source with the filing owner. Use a blank template or anonymised test data;
do not upload a real filing just to try column mapping.
- Open statutory report templates and check for an existing template before selecting Add template. If this area is missing, ask an administrator to check feature availability and your access; do not use another address to bypass permissions.
- Under Name and file, enter a recognisable Template name, such as the form and provider name. Choose the appropriate Rifena data source, then upload the Excel file. If the required source is absent, select Create a custom data source, enter a Definition name, and select a Rifena dataset. A custom name does not change the data or reporting period supported by that dataset.
- Under Map data, match locations in Excel to Rifena data. In Data tables to export, check the Rifena collection, select the correct Sheet, and set the Data start row. Select each column in the workbook preview and choose the corresponding Rifena field; for example, a name column should receive an employee name, not an employee code. Check automatically suggested mappings too. For a company name or another value at a separate location, expand Advanced mapping options, then use Fixed cells → Add cell and check the Target cell.
- Under Review, check the data source, file name, and mappings. Resolve Technical validation errors before saving. Read Legal field guidance for items that need further verification; this is not confirmation that the template is suitable for filing. Select Save template. The saved version is a Draft and is not yet available for generating a new report.
- Open the draft version, choose the Reporting year and Reporting month if shown, then select Generate preview. Select Download preview and open the resulting file. Check the worksheet, first data row, names, identifiers with leading zeros, dates, and totals against the source data. Reviewing the on-screen mappings alone is not enough.
- After the filing owner has reviewed the preview file and confirmed the template is suitable, select Publish version. Expected result: the version becomes Published and is available to the person generating reports. This makes the template available in Rifena; it does not send a template or filing to an authority.
When the provider changes the file: open the existing template and use Add a new file version to upload the replacement. Review each changed location and choose Accept suggested location, Keep previous location, Remove this mapping, or Confirm remap according to the actual file. Select Save draft version, generate and check a new preview, then publish that version. Do not overwrite the old version.
When a version is no longer used: select Retire version after handing over its replacement. A retired version cannot be selected for a new report; existing reports retain the version they used. Regenerating or amending an existing report may continue to use its pinned version, rather than switching automatically to the latest template.
If saving did not finish: return to the list and check whether the template was created. If the template exists but has no version, open it and add a file version. Do not create a duplicate template just because the previous upload failed.
Rifena administrators update system statutory definitions through reviewed data releases. Organisation administrators manage their own Excel templates and versions. A custom data source or a legal reference entered by an organisation does not replace an official legal source.
Verify and hand off the change
- Sign in again with an account representing the affected role.
- Open the exact screen and perform one safe read or trial action.
- Compare the visible result, denial message, and data scope.
- Record each area as Active, Not applicable, or Specialist action.
- Hand off the next action and owner to HR, payroll, network, or identity.
Result to confirm: the representative account opens only the areas it owns, the change affects the intended scope, and unrelated settings remain unchanged.
If a card, action, or result is missing, use Settings issues before changing another setting.